
Tilix & Neofetch Branded Terminal Setup
Title: Tilix Terminal Setup with Branded Header (Ubuntu 22.04)
Category: Linux Customization
Date: June 4, 2025
Tilix Terminal Setup with Branded Header (Ubuntu 22.04)
If you're looking to upgrade from the default GNOME Terminal on Ubuntu, Tilix offers a tiled terminal experience with support for Nerd Fonts, transparency, and persistent sessions. This guide walks through installing Tilix and customizing your terminal with a branded system info header.
Step 1: Install Tilix
sudo apt update
sudo apt install tilix -y
Step 2: Make Tilix Your Default Terminal
Run the following:
sudo update-alternatives --config x-terminal-emulatorUse the arrow keys to select Tilix, then press Enter.
Step 3: Install Nerd Fonts (Optional)
To fully enjoy custom prompts or themes like Starship, you'll want a Nerd Font installed on your host machine:
-
Download FiraCode Nerd Font or Hack Nerd Font
-
Install it on your host OS
-
In Tilix:
Preferences → Default Profile → Text → Enable Custom Font
Select your installed Nerd Font
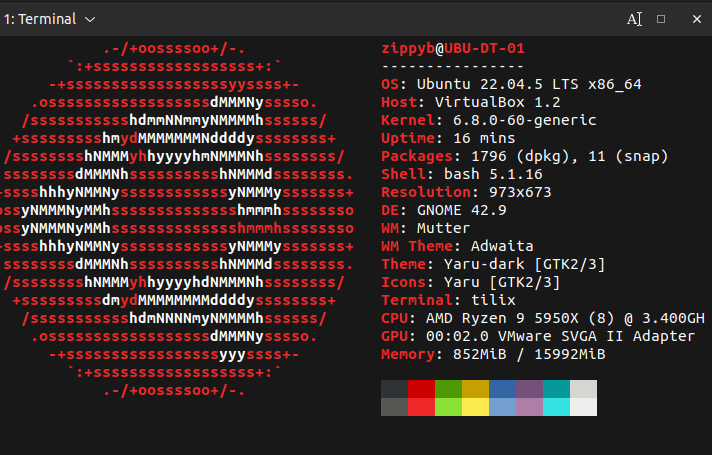
Step 4: Add a System Info Banner with Neofetch
Install Neofetch:
sudo apt install neofetch -yThen edit your ~/.bashrc file:
nano ~/.bashrcAdd this line at the end:
neofetchSave and apply:
source ~/.bashrcYou’ll now see a clean, branded system header every time you open your terminal!
🖼️ 
Summary
-
Tilix offers a modern, split-pane terminal experience
-
Neofetch adds a professional system info banner
-
You can easily integrate with fonts, themes, and shell enhancements
No Comments