Project: Proxmox Standalone GPU Passthrough Server Build
This Chapter is for a proxmox build and passing a GPU into one of the virtual machines.
- Project: Proxmox Standalone GPU Passthrough Server Build
- Installing Proxmox VE 8.2 on a Standalone GPU Passthrough Server
- Installing Pop!_OS (NVIDIA Edition) in Proxmox
- Setting Up SSH Access in Pop!_OS (Proxmox VM)
- NVIDIA GPU Passthrough in Pop!_OS (Proxmox VE 8.2.7)
Project: Proxmox Standalone GPU Passthrough Server Build
Date: May 31st 2025
Category: Virtualization / Homelab Build
Hardware Overview
| Component | Model / Spec |
|---|---|
| Motherboard | Gigabyte B550 AORUS Elite AX V2 |
| CPU | AMD Ryzen 7 3700X (8-core / 16-thread) |
| GPU | NVIDIA RTX 2070 Super |
| RAM | 32GB DDR4 3200 MHz |
| Drive 1 (OS) | Kioxia 512GB NVMe Gen4 |
| Drive 2 (VMs) | Inland 512GB NVMe Gen3 |
| Host OS | Proxmox VE 8.2.7 |
| Primary VM | Pop!_OS 22.04 LTS (NVIDIA ISO) |
BIOS Setup for Proxmox + GPU Passthrough
Motherboard: Gigabyte B550 AORUS Elite AX V2
1. Enter BIOS
-
Press
DELrepeatedly during boot to enter BIOS.
2. Load Optimized Defaults (Recommended)
-
Go to the Save & Exit tab.
-
Choose Load Optimized Defaults
-
Press
F10to reboot and re-enter BIOS.
3. Enable Virtualization (SVM Mode)
4. Enable IOMMU
-
Go to:
Settings → IO Ports -
Set IOMMU →
Enabled
5. Enable Above 4G Decoding
-
Also under:
Settings → IO Ports -
Set Above 4G Decoding →
Enabled
6. Set Initial Display Output
-
Go to:
Settings → IO Ports -
Set Initial Display Output →
PCIe 1 Slot
7. Disable CSM for UEFI Boot
-
Go to:
Boot -
Set CSM Support →
Disabled
8. Resizable BAR Support (Optional)
-
Settings → IO Ports -
Set Re-Size BAR Support →
Disabled(recommended for stability)
9. Fan Control (Optional)
-
Smart Fan 5 Settings -
Set profiles for optimal cooling: Silent, Normal, Full-Speed
10. Save and Exit
-
Press
F10, confirm changes, and reboot.
Now its time to install proxmox on the new setup.
Installing Proxmox VE 8.2 on a Standalone GPU Passthrough Server
Date: June 1st, 2025
Category: Virtualization / Proxmox Deployment
Backlink: Project: Proxmox Standalone GPU Passthrough Server Build
Requirements
-
Proxmox VE 8.2 ISO Installer
-
Bootable USB creation tool (Etcher or Rufus)
-
At least 1 NVMe SSD (recommended Gen4 for performance)
-
BIOS configured for UEFI boot, IOMMU, virtualization, and passthrough (see backlink for full BIOS setup)
Step 1: Download and Flash Proxmox ISO
-
Go to Proxmox Downloads
-
Download the latest ISO:
proxmox-ve_8.2-1.iso(or newer) -
Use Balena Etcher or Rufus to flash it to a USB drive
-
Select ISO
-
Select USB
-
Click Flash
-
Step 2: Install Proxmox VE
-
Boot from the USB using UEFI Boot Mode
-
Select Install Proxmox VE from the menu
-
Accept license agreement
-
Choose the Gen4 NVMe (Kioxia in this case) as the target disk
-
Configure:
-
Region & Timezone
-
Strong root password & email
-
Hostname (e.g.
proxmox-node2.local) -
Static IP address (e.g.
192.168.1.101) or use DHCP for testing
-
Step 3: First Boot and Web GUI Access
-
Remove the USB when prompted
-
Log into the Proxmox web GUI:
https://<your-proxmox-ip>:8006 -
Accept the self-signed certificate
Step 4: Secondary Drive (Optional)
If you have a second NVMe (like an Inland Gen3):
-
Go to
Datacenter > Disks -
Select
/dev/nvme1n1 -
Wipe the disk
-
Initialize it with GPT
-
Create a new storage:
-
As LVM-Thin for VM disk storage
-
Or as Directory for ISOs/backups
-
Installing Pop!_OS (NVIDIA Edition) in Proxmox
Date: June 1st, 2025
Category: Virtualization / VM Guest OS Configuration
Backlink: Installing Proxmox VE 8.2 on a Standalone GPU Passthrough Server
Goal
Install Pop!_OS 22.04 LTS (NVIDIA ISO) as a Proxmox VM with a passed-through RTX 2070 Super GPU, ensuring full graphics acceleration and NVIDIA driver functionality.
Step 1: Download the Pop!_OS NVIDIA ISO
Download directly to Proxmox or to your workstation:
🔗 Pop!_OS 22.04 LTS NVIDIA ISO
Option 1: Upload via Proxmox GUI
-
Go to
Datacenter > local (proxmox89) > ISO Images -
Click Upload and choose the ISO file from your computer
Option 2: Download from URL
-
In
ISO Images, click **Download from URL` -
Paste the ISO link above and click Query URL
-
Confirm filename and click Download
The ISO will appear in the list once it's downloaded.
Step 2: Create the Pop!_OS VM
General Tab
-
Node:
proxmox89 -
VM ID:
100(or next available) -
Name:
POP_OS_NVIDIA -
✅
Start at boot
OS Tab
-
Use ISO:
pop-os_22.04_amd64_nvidia_53.iso
System Tab
-
BIOS:
OVMF (UEFI) -
Machine:
q35 -
✅ Add EFI Disk
-
❌ Pre-Enrolled Keys (disable Secure Boot)
-
SCSI Controller:
VirtIO SCSI single -
✅ QEMU Agent
-
Graphic Card:
Default(or change toNonelater for passthrough)
Disks Tab
-
Bus:
SCSI -
Storage:
Inland512 -
Size:
200 GiB -
✅ IO thread
CPU Tab
-
Sockets:
1 -
Cores:
6–8 -
Type:
host
Memory Tab
-
Size:
16384 MiB
Network Tab
-
Bridge:
vmbr0 -
Model:
VirtIO (paravirtualized) -
✅ Firewall (optional)
Click Finish to create the VM.
Step 3: Attach GPU (Passthrough)
-
Stop the VM.
-
Go to
Hardware > Add > PCI Device -
Select both:
-
01:00.0NVIDIA VGA Controller -
01:00.1NVIDIA HD Audio
-
-
Enable:
-
✅ All Functions
-
✅ Primary GPU
-
✅ ROM-Bar
-
Step 4: Boot and Install Pop!_OS
-
Start the VM
-
If passthrough is correct, output will show on monitor connected to GPU
-
Use “Erase Disk and Install”
-
Set username and password
Setting Up SSH Access in Pop!_OS (Proxmox VM)
Date: June 1st, 2025
Category: Remote Access / Virtual Machine Setup
Backlink: Installing Pop!_OS (NVIDIA Edition) in Proxmox with GPU Passthrough
Goal
Enable secure remote access to your Pop!_OS virtual machine via SSH.
Step 1: Install and Enable OpenSSH Server
Open a terminal in your Pop!_OS VM and run:
sudo apt update
sudo apt install openssh-server -y
Then start and enable the service:
sudo systemctl enable ssh
sudo systemctl start ssh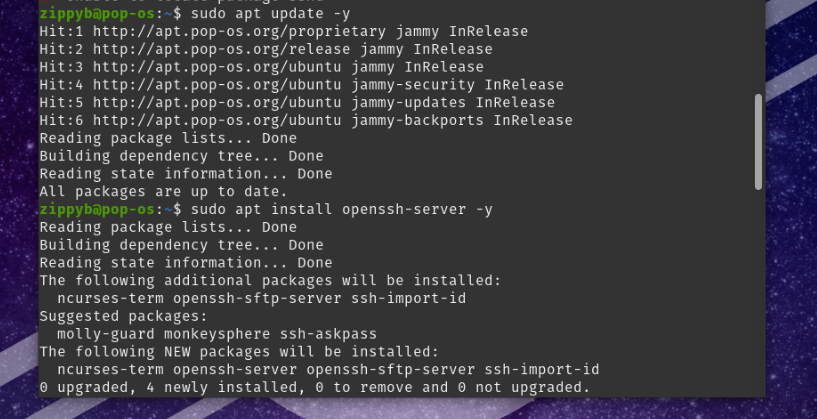
Step 2: Verify SSH is Running
Check the status of the SSH server:
sudo systemctl status sshYou should see:
-
Active: active (running)

Step 3: Find the IP Address
You can find the IP address in two ways:
-
From Proxmox Dashboard: Under the VM summary tab
-
Inside Pop!_OS:
ip a | grep inet
Step 4: SSH From Another Machine
From your host machine or another computer on the LAN, connect:
ssh zippyb@192.168.1.151You’ll be prompted to accept the fingerprint and then enter your user password.

Optional: Use SCP to Transfer Files
scp file.txt zippyb@192.168.1.151:/home/nate/Or use rsync for large/recurring syncs:
rsync -avz project/ zippyb@192.168.1.151:/home/nate/project/Step 4: Enable and Configure UFW Firewall
-
Enable UFW:
sudo ufw enable-
Allow SSH through the firewall:
sudo ufw allow ssh-
Check firewall status:
sudo ufw status verbose
Done
I can now securely connect to my Pop!_OS VM using SSH for remote configuration and file transfers.
NVIDIA GPU Passthrough in Pop!_OS (Proxmox VE 8.2.7)
Date: June 1st, 2025
Category: Virtualization / GPU Passthrough
Backlink: Setting Up SSH Access in POP_OS Proxmox
This enable's GPU Passthrough as I'm going to use this VM for Local AI projects
Step 1: Enable IOMMU in Proxmox
Edit the GRUB configuration:
nano /etc/default/grubSet this line for AMD CPUs:
GRUB_CMDLINE_LINUX_DEFAULT="quiet amd_iommu=on"Update GRUB and reboot:
update-grub
reboot
Step 2: Bind GPU to vfio-pci
Get the NVIDIA GPU and related device IDs:
lspci -nn | grep -i nvidiaExample output:
07:00.0 VGA compatible controller [10de:1e84]
07:00.1 Audio device [10de:10f8]
07:00.2 USB controller [10de:1ad8]
07:00.3 Serial bus controller [10de:1ad9]
Bind them to vfio-pci:
echo "options vfio-pci ids=10de:1e84,10de:10f8,10de:1ad8,10de:1ad9" > /etc/modprobe.d/vfio.confThen:
update-initramfs -u
reboot
Step 3: Confirm vfio-pci Binding
Check if vfio-pci is now in use:
lspci -nnk | grep -A 3 -i nvidiaYou should see something like:
Kernel driver in use: vfio-pciStep 4: Attach GPU to Pop!_OS VM
In the Proxmox Web GUI:
-
Power off the Pop!_OS VM.
-
Go to
Hardware > Add > PCI Device. -
Add only the VGA compatible controller (e.g.,
07:00.0). -
Enable the following checkboxes:
-
ROM-Bar
-
Primary GPU
-
Optional: You can try passing the other 3 GPU functions (Audio, USB, Serial Bus) if needed.
-
Start the VM.
Step 5: Verify GPU Access in Pop!_OS
Inside the VM, run:
nvidia-smiTo check for CUDA:
nvcc --version(Optional if GUI is installed):
glxinfo | grep "OpenGL renderer"Completion Notes
-
GPU passthrough is functional.
-
Host Proxmox system is stable and still accessible via Web GUI.
-
Pop!_OS VM is now accelerated using the RTX 2070 SUPER.
-
SSH and firewall (UFW) are set up on the guest.