08 - Windows 11
Windows 11 Stuff
- Windows 11 Application Update Strategy – Patch My PC, WinGet, and Microsoft Store
- Domain-Joined Windows 11 VM with Microsoft Edge Lockdown for Lab Use
- Bypassing TPM, Secure Boot, and Microsoft Account During Windows 11 VM Setup
- Creating a PowerShell Backup Script for VPS Syncthing Folders
- Resetting Network Adapters and TCP/IP Stack
- Disabling the default admin account in Windows 10/11
- 20 things you can do with Win+R
- Running Syncthing Automatically and Hidden on Log on.
- Using Robocopy
- Windows Sysinternals Toolkit Walkthrough
Windows 11 Application Update Strategy – Patch My PC, WinGet, and Microsoft Store
Category: Windows 11 / System Maintenance
Purpose: Automate updates for third-party Windows applications
Target Audience: Home users, power users, IT professionals
Date: 12/28/2025
Overview
Keeping third-party Windows applications up to date is critical for security, stability, and performance, but manually checking each vendor is inefficient and error prone.
Patch My PC Home Updater is a free, lightweight utility that automatically scans for outdated applications and updates them silently in the background. It complements Windows Update and Microsoft Store auto-updates by handling non-Store desktop applications.
This guide documents how to install, configure, and automate Patch My PC Home Updater on Windows 11.
What Patch My PC Home Updater Does
Patch My PC Home Updater focuses on third-party application patching, not Windows itself.
Key Capabilities
-
Scans installed applications for outdated versions
-
Updates supported apps automatically or on demand
-
Supports silent installs (no pop-ups)
-
Uses Windows Task Scheduler for automation
-
Can install or uninstall supported apps
-
Portable (no traditional installer required)
What It Does Not Do
-
Does not update Microsoft Store apps
-
Does not manage Windows Updates
-
Only updates applications included in its supported catalog
Supported Application Types (Examples)
Patch My PC supports hundreds of popular applications, including:
-
Browsers (Chrome, Firefox, Edge)
-
Media tools (VLC, 4K Video Downloader)
-
Utilities (Notepad++, 7-Zip)
-
VPN clients (Proton VPN)
-
Vendor tools (Raspberry Pi Imager)
Applications like Battle.net, Steam, Discord, and GPU drivers are intentionally excluded since they handle their own updates internally.
Installation
-
Download Patch My PC Home Updater from the official site:
https://patchmypc.com/home-updater
-
Run
PatchMyPC.exe(run as administrator for best functionality) -
No installation wizard, no account, no ads
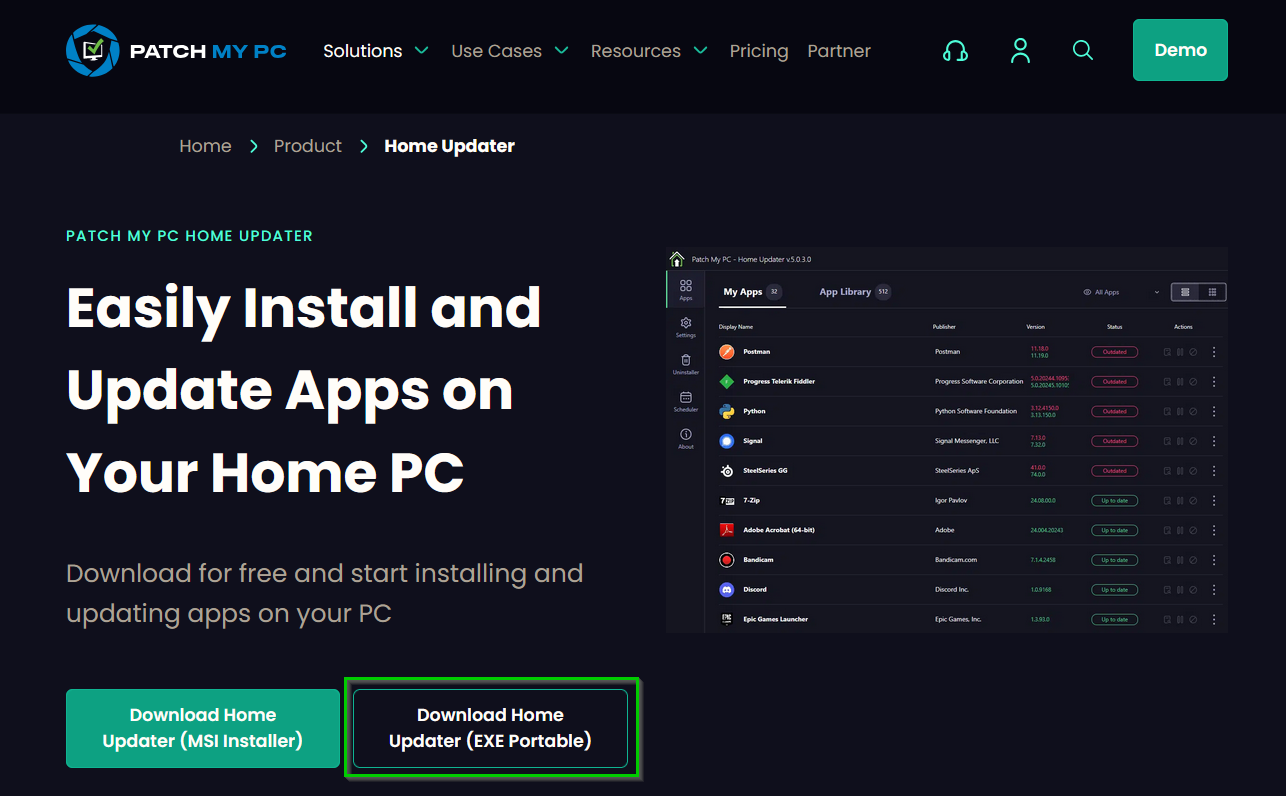
The application will immediately scan your system.
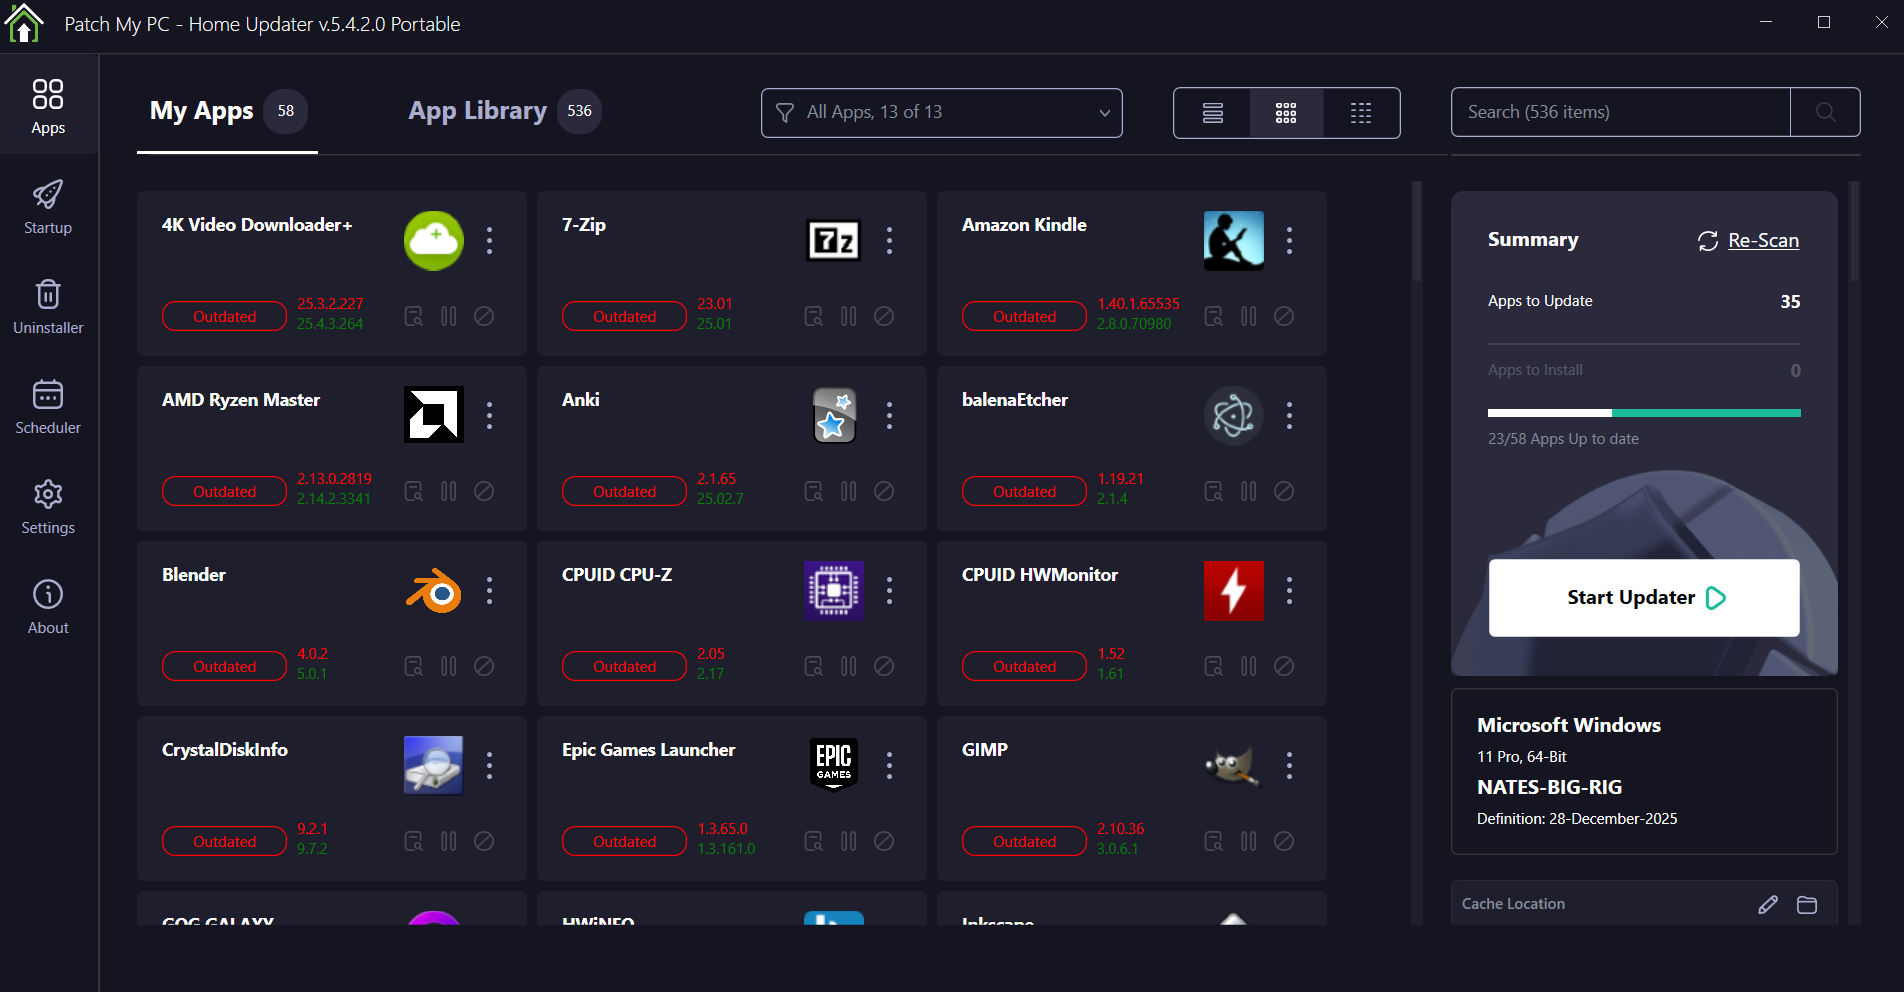
Initial Update Baseline
On first launch:
-
Outdated apps appear in red
-
Up-to-date apps appear in green
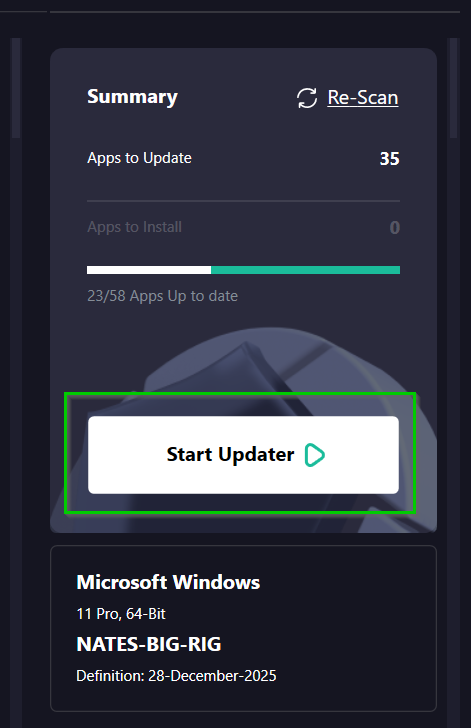
Click Perform Updates once to bring all supported apps fully up to date.
This establishes a clean baseline before enabling automation.
Recommended Configuration
Open Settings (gear icon) and apply the following:
Safety Settings
-
Create restore point before updating
-
Skip updates if an app is currently running
Silent Operation
-
Enable silent updates
-
Suppress reboot prompts
-
Disable post-install auto-launch
Cleanup
-
Delete installers after installation
These settings ensure updates run quietly and safely in the background.
Application Selection
Under Settings → Applications:
-
Review the supported app list
-
Uncheck any apps you prefer to update manually
-
Leave common utilities and browsers enabled
This gives you granular control over what Patch My PC manages.
Automatic Scheduling (Core Feature)
Patch My PC uses Windows Task Scheduler for automation.
-
Go to Settings → Scheduling
-
Enable Automatically update applications
-
Recommended schedule:
-
Frequency: Weekly
-
Day: Sunday
-
Time: Early morning (e.g., 3:00 AM)
-
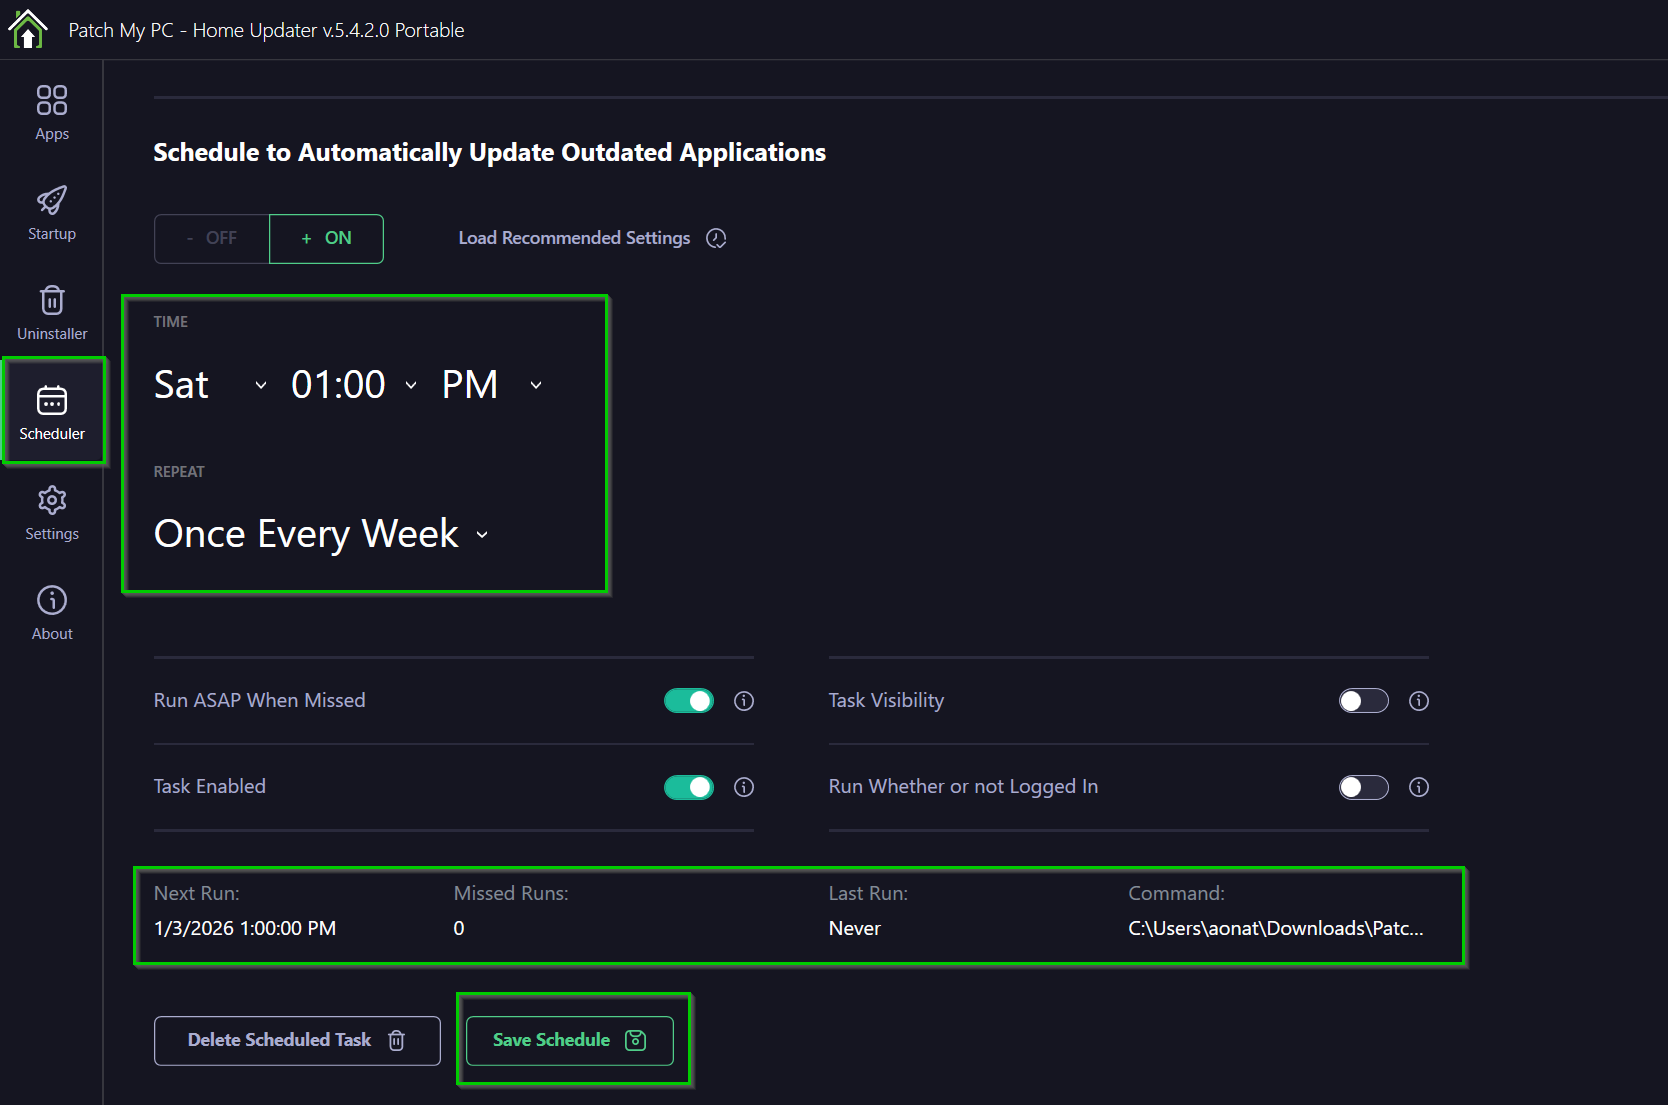
Once enabled, Patch My PC will run automatically without user interaction.
Verifying the Scheduled Task (Optional)
To confirm the task exists:
-
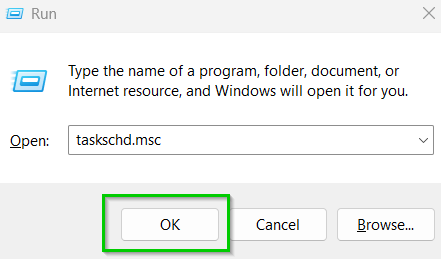
Press Win + R
-
Run:
taskschd.msc
-
Navigate to:
Task Scheduler Library → Patch My PC
Recommended Companion: WinGet
For broader application coverage, Patch My PC Home Updater pairs effectively with WinGet (Windows Package Manager). While Patch My PC focuses on common third-party desktop applications, WinGet excels at managing developer tools, command-line utilities, and Microsoft-maintained packages.
Right click start button > Run Terminal as administrator
WinGet Command
Run this once to create the folder, then run the WinGet command.
Create Folder
New-Item -Path "C:\Logs" -ItemType Directory -Force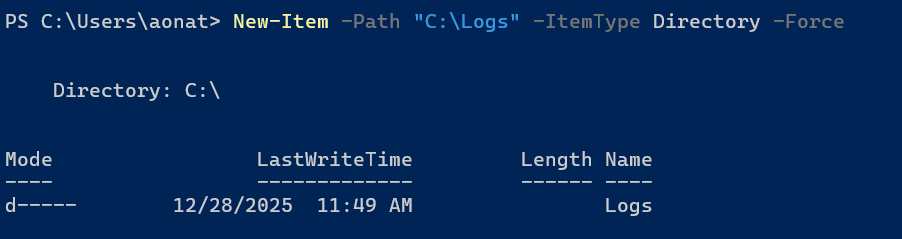
Then run this command
winget upgrade --allThis will show everything happening in the terminal window:
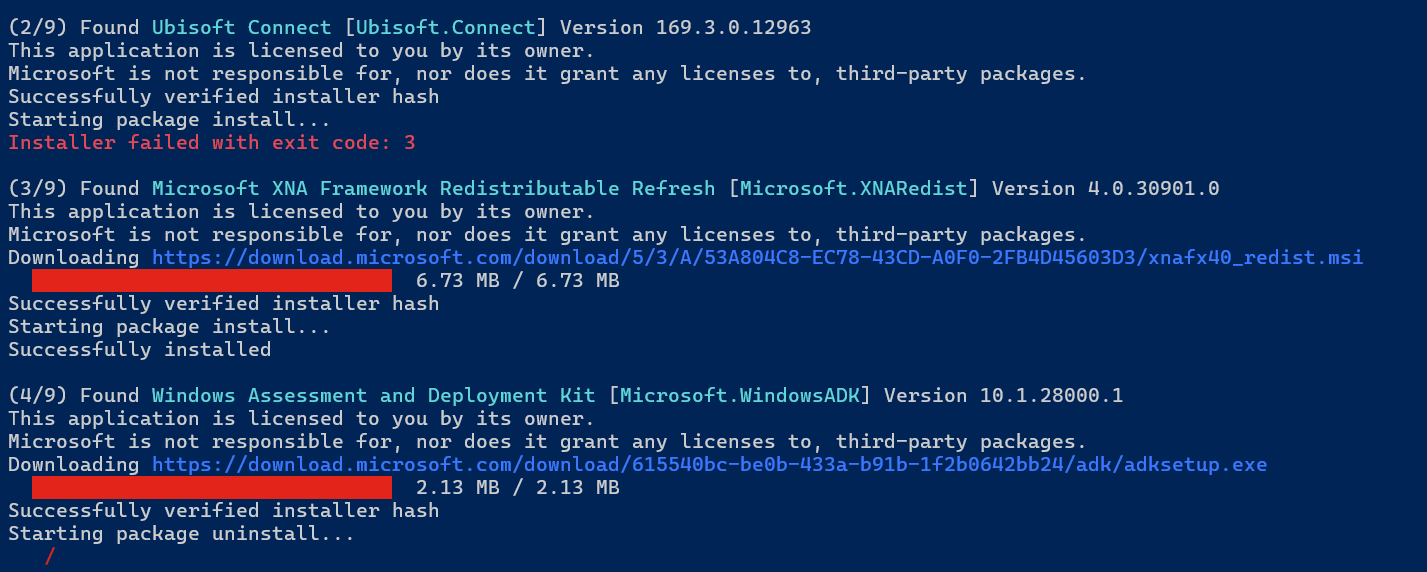
Note Ubisoft connect failed because it sux and it probably needs a game to be launched before updating
To run silently and just record to the log file we can run this:
winget upgrade --all --silent --accept-package-agreements --accept-source-agreements >> C:\Logs\winget.log 2>&1Optional (.ps1 script for better logging)
If you want the log to include timestamps and also capture errors cleanly:
Copy the code below in NPP and save as a .ps1 file
New-Item -Path "C:\Logs" -ItemType Directory -Force
"==== $(Get-Date) ====" | Out-File -FilePath "C:\Logs\winget.log" -Append -Encoding utf8
winget upgrade --all --silent --accept-package-agreements --accept-source-agreements 2>&1 | Out-File -FilePath "C:\Logs\winget.log" -Append -Encoding utf8
This command updates all supported WinGet-managed applications silently and is well-suited for automation through Task Scheduler and also provides a log file at C:\Logs\ for any errors.
Best Practice Update Coverage
A layered approach provides the most reliable results:
-
Patch My PC - Browsers, utilities, media tools, VPN clients
-
WinGet - Developer tools, CLI utilities, Microsoft-maintained packages
-
Microsoft Store - Store applications (auto-updates enabled)
These tools operate independently, do not conflict, and together provide near-complete application update coverage on Windows 11.
Security & Reliability Notes
-
Patch My PC is widely trusted in both home and enterprise environments
-
Uses vendor-provided installers with no repackaging
-
No account creation or telemetry tracking required
-
Optional system restore points provide rollback protection during updates
Final Notes
Patch My PC Home Updater significantly reduces manual maintenance while improving overall system security and reliability.
When combined with WinGet automation and Microsoft Store auto-updates, it creates a fully automated, low-maintenance application update strategy suitable for both home labs and professional Windows 11 environments.
Domain-Joined Windows 11 VM with Microsoft Edge Lockdown for Lab Use
Date: June 7, 2025
Category: Windows 11 / GPO / Domain Lab Hardening
Backlink: Bypassing TPM, Secure Boot, and Microsoft Account During Windows 11 VM Setup
Overview
This VM is domain-joined to library.local and intended to simulate a public-access or library-style machine for a generic user (libraryuser). Group Policy was used to lock down Microsoft Edge and restrict system-level access.
Environment
-
OS: Windows 11 VM
-
Domain:
library.local -
Domain Controller: Windows Server 2022
-
OU:
LibraryLabUsers -
User:
libraryuser -
GPO:
Library User Restrictions -
Template Type: Classic ADM (no ADMX available at the time)
GPO Settings Applied
Control Panel & Program Access
-
🔒 Prohibit access to Control Panel and PC settings
-
🔒 Remove Add or Remove Programs
Microsoft Edge Configuration
-
🧹 Clear browsing data when Edge closes
-
🧹 Clear cached images and files on close
-
🚫 Disable saving browser history
-
✅ Enable Do Not Track
-
⚠️ Enable insecure download warnings
Edge Extensions & Downloads
-
🚫 Block external extensions from being installed
Startup / Homepage Settings
-
🏠 Configure homepage URL:
https://docs.natenetworks.com -
🔁 Action on Edge startup: Open list of URLs
-
🧭 Sites to open:
-
https://docs.natenetworks.com -
https://artash.io
-
-
🧭 Set new tab page as homepage
Start Menu and Taskbar Restrictions
-
❌ Disable context menus in Start Menu
-
❌ Remove Run from Start Menu
Ctrl+Alt+Del Restrictions
-
❌ Remove Change Password
-
❌ Remove Lock Computer
-
❌ Remove Logoff
-
❌ Remove Task Manager
Results
Logging in as libraryuser now:
-
Edge launches directly to the approved URLs
-
All Edge settings and customization options are blocked
-
Control Panel and system tweaks are locked down
-
User cannot access Run, Task Manager, or make profile/system changes
Next Steps
-
Prevent Edge Settings Access
-
If not already enabled, locate:
Prevent access to the settings page in Microsoft Edge
→ Set to Enabled
-
-
Add AppLocker Rules
-
Restrict
.exelaunches outside ofC:\Program FilesandC:\Windows
-
-
Enable SmartScreen & SafeSearch Policies
-
Protect against malicious or adult content
-
Optionally configure DNS-based content filtering (NextDNS/OpenDNS)
-
-
Redirect Known Folders
-
Use Folder Redirection to isolate documents and desktop paths per user
-
-
Add User Logoff Timer / Idle Policy
-
Use Task Scheduler or GPO to log off inactive users after X minutes
-
Bypassing TPM, Secure Boot, and Microsoft Account During Windows 11 VM Setup
Date: June 7, 2025
Category: Windows / Virtualization / Lab Setup
Purpose: Create Windows 11 VMs for a domain lab without being blocked by hardware checks or Microsoft Account requirements.
Background
When installing Windows 11 on VirtualBox or similar platforms, you may encounter the following issues:
-
TPM 2.0 or Secure Boot not detected
-
Forced sign-in with a Microsoft account
This guide walks through bypassing both roadblocks for lab environments.
Requirements
-
Windows 11 ISO
-
VirtualBox or other VM platform
-
No TPM or Secure Boot hardware needed
Step 1: Bypass TPM, Secure Boot, and RAM Checks
-
When you see a message like “This PC can’t run Windows 11,” press:
Shift + F10to open Command Prompt.
-
Type:
regedit -
In Registry Editor, navigate to:
HKEY_LOCAL_MACHINE\SYSTEM\Setup -
Right-click
Setup→ New > Key → name it:LabConfig -
Inside
LabConfig, create the following DWORD (32-bit) Values:-
BypassTPMCheck→ 1 (Decimal) -
BypassSecureBootCheck→ 1 (Decimal) -
BypassRAMCheck→ 1 (Decimal)
-
-
Close Regedit and the Command Prompt.
-
Click Back then Next to retry setup.
Step 2: Bypass Microsoft Account Requirement
Once Windows setup asks you to connect to a network or sign in:
Option A: Use Bypass Command
-
Press:
Shift + F10 -
Type:
oobe\bypassnro -
The VM will reboot automatically.
-
On reboot, choose:
-
“I don’t have internet” or
-
“Continue with limited setup”
-
-
Create a local user account to complete setup.
Option B: Temporarily Disable Networking (Optional)
If oobe\bypassnro doesn’t show the offline setup:
-
Shut down the VM
-
In VirtualBox Settings > Network, uncheck:
Enable Network Adapter -
Boot the VM and try setup again — no internet = local account path
-
Re-enable networking once setup is complete
Result
You now have a clean Windows 11 VM with:
-
Local admin account
-
No TPM, Secure Boot, or Microsoft Account enforced
Creating a PowerShell Backup Script for VPS Syncthing Folders
I'm using Robocopy to sync folders with logic to skip unchanged files.
# Define source and destination paths
$source1 = "C:\Users\aonat\BookStack-VPS-Backups"
$source2 = "C:\Users\aonat\Default Folder"
$destination = "E:\VPS-Backups"

# Ensure destination exists
if (!(Test-Path -Path $destination)) {
    New-Item -Path $destination -ItemType Directory
}

# Mirror BookStack-VPS-Backups
Robocopy $source1 "$destination\BookStack-VPS-Backups" /MIR /Z /FFT /XA:H /W:5 /R:3 /XO

# Mirror Default Folder
Robocopy $source2 "$destination\Default Folder" /MIR /Z /FFT /XA:H /W:5 /R:3 /XO
The only thing that is confusing in the script is all the logic trailing the Robocopy commands. Here is the breakdown of that:
-
/MIR– Mirrors folder (adds new, removes deleted files) -
/XO– Excludes older files (does not overwrite newer destination files) -
/Z– Enables restartable mode (safe for external drives) -
/FFT– Treats file times as FAT-style (2-second tolerance; good for cross-OS syncing) -
/XA:H– Skips hidden files -
/W:5//R:3– Waits 5 seconds and retries 3 times on errors
I tested and made sure the script worked as intended:
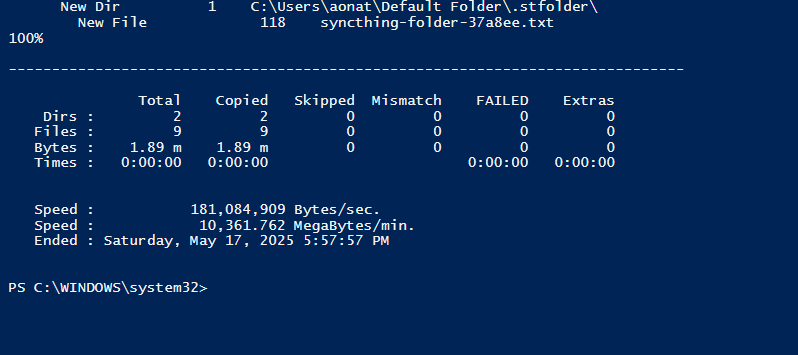
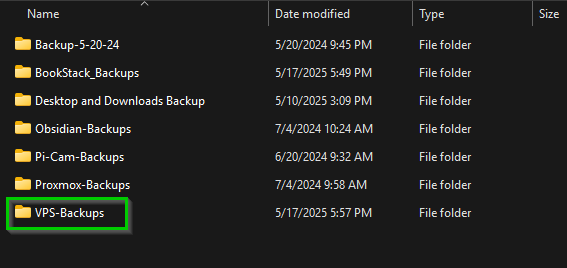
It indeed copied the folders and files I needed:

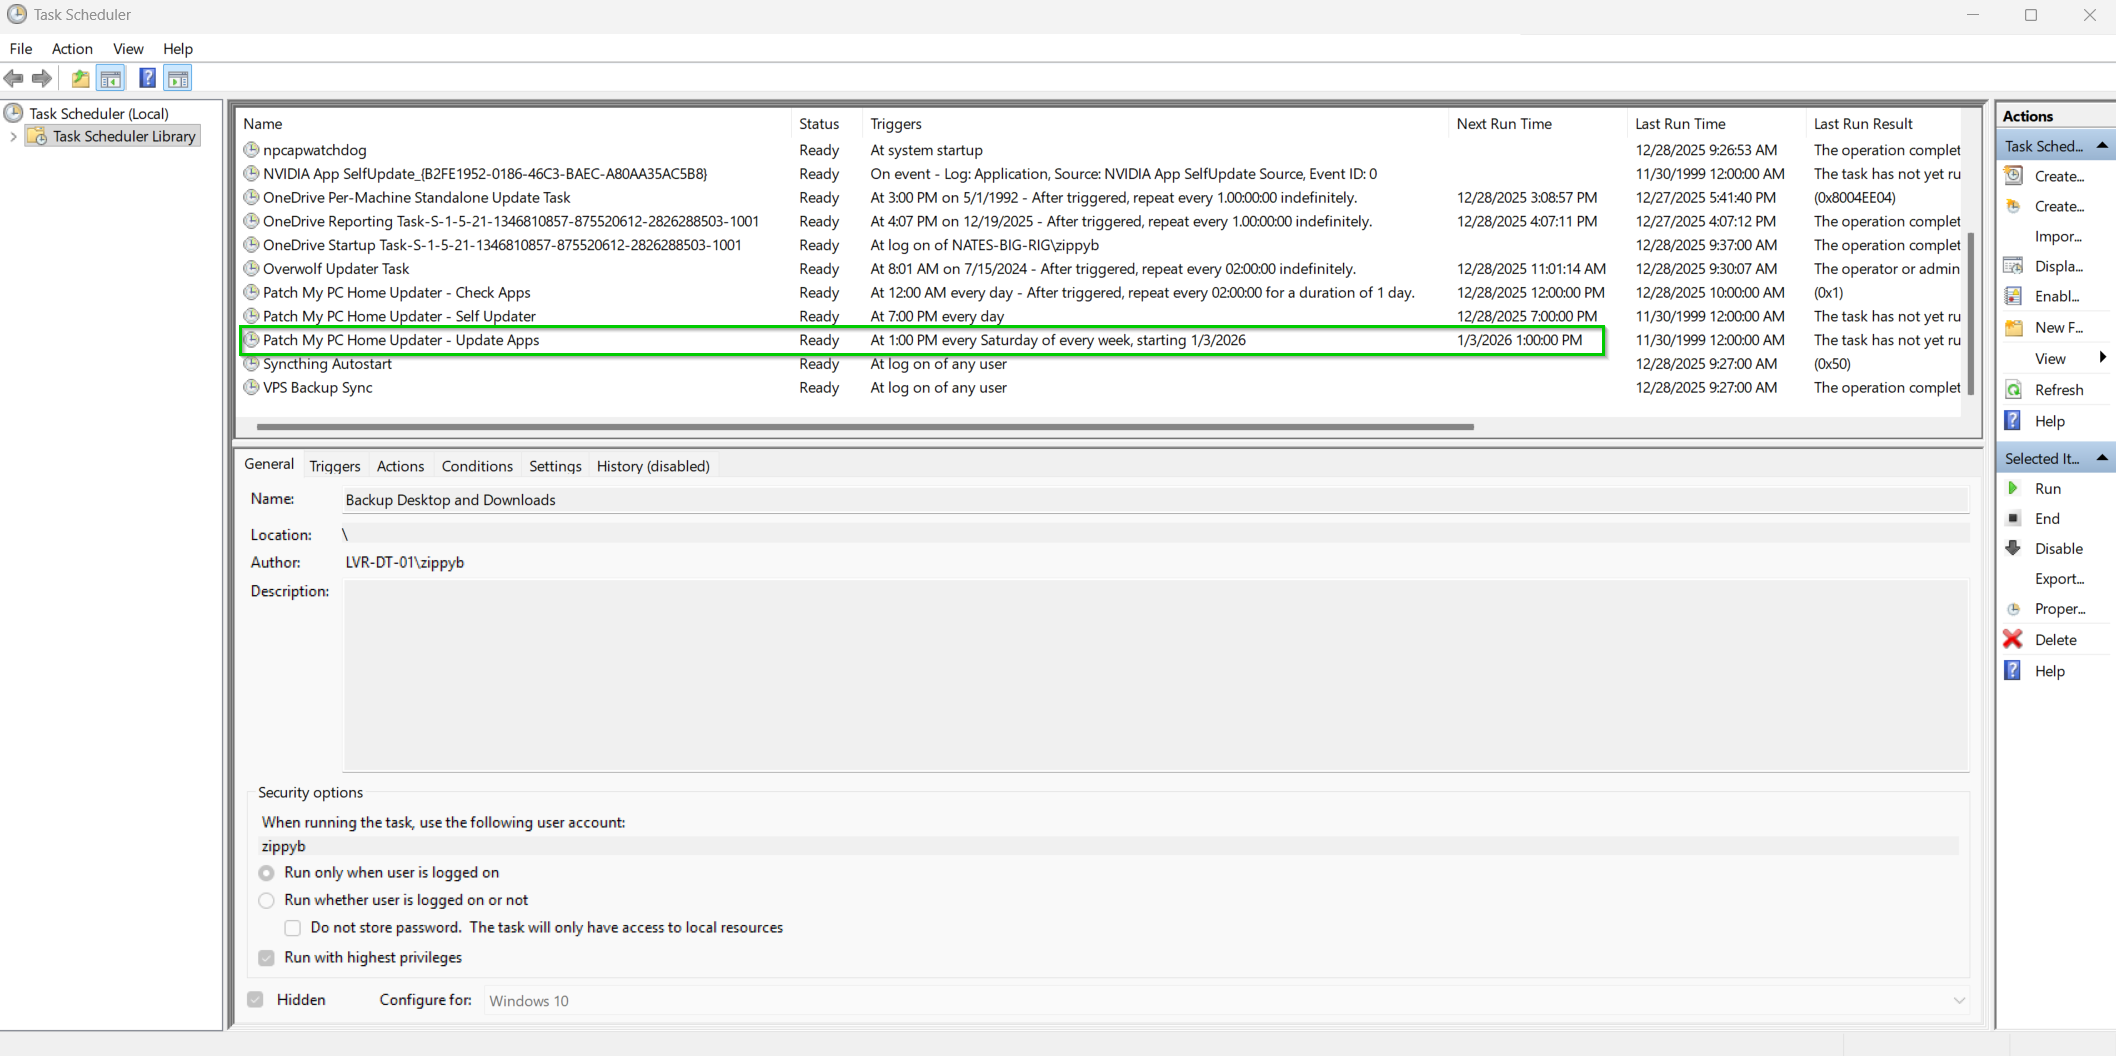
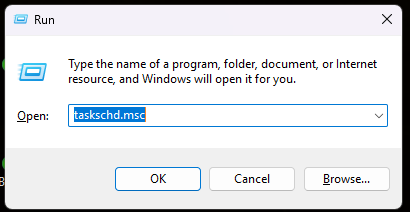
I then created a task in the Task Scheduler by doing Win + R and entering taskschd.msc
Create New Task:

Under General Tab create a Name and check the 2 boxes below:

Under the Triggers tab click New, Begin Task at Logon, and for Any User:
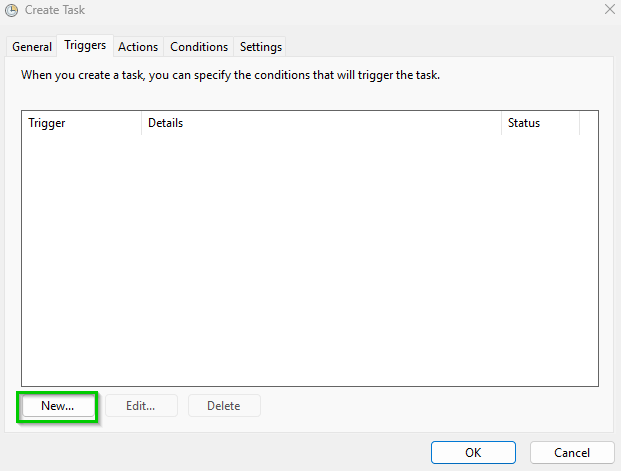

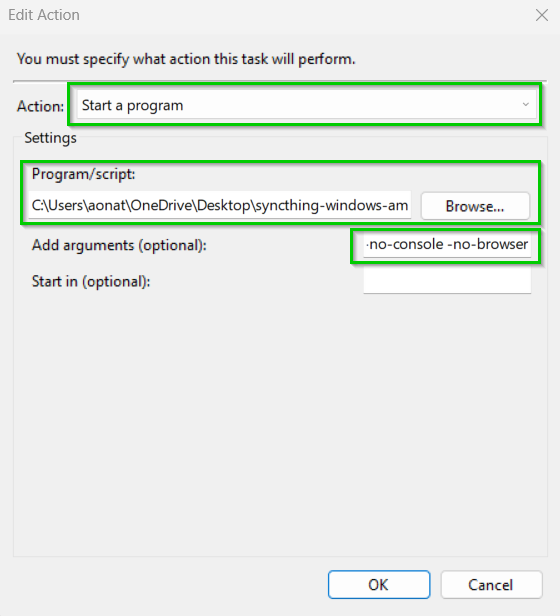
Under the Actions Tab, Click New > Start a Program > powershell.exe
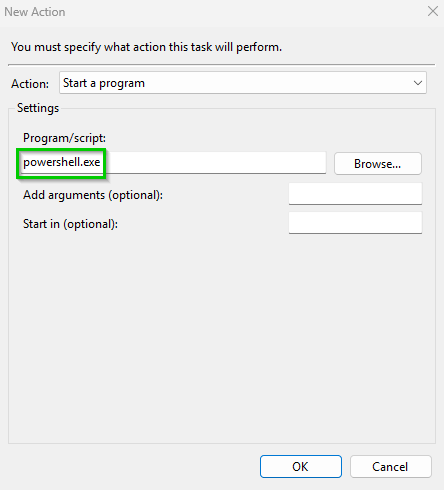
Add this argument script in the Add arguments section replacing the path to the script:
-NoProfile -ExecutionPolicy Bypass -File "C:\Path\To\backup-vps-folders.ps1"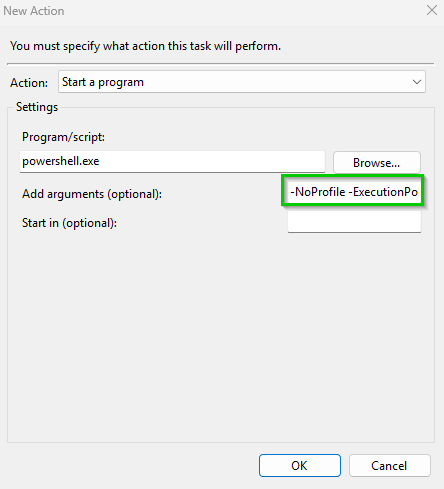
Under Settings do the following:
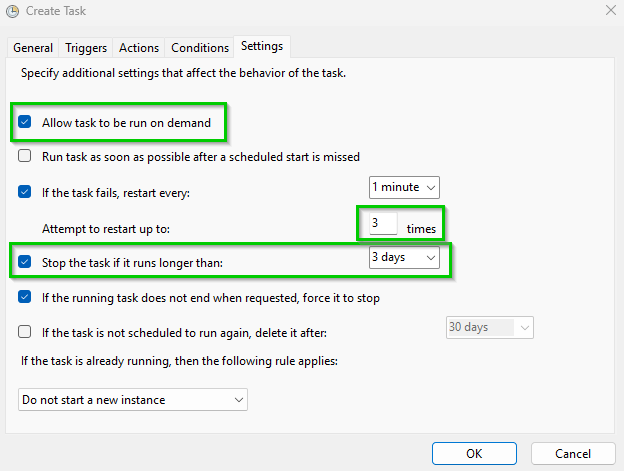
Click OK and then it will prompt you for your logon password:
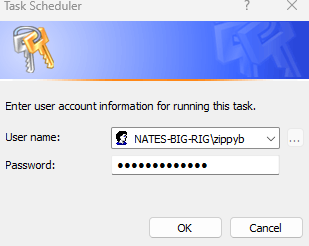
Once you enter that correctly this will run on logon and make sure you have another offsite backup out of Syncthing.
Resetting Network Adapters and TCP/IP Stack
To reset network adapters in Windows, you can use the Command Prompt with administrative privileges. Here's how:
1. Open Command Prompt as an administrator. You can do this by searching for "Command Prompt" in the Start menu, right-clicking on it, and selecting "Run as administrator."
2. In the Command Prompt window, type the following command and press Enter:
netsh winsock resetThis command resets the Winsock catalog to a clean state.
3. After executing the above command, restart your computer.
Additionally, if you want to reset TCP/IP stack, you can use the following command:
netsh int ip resetAgain, restart your computer after running this command. This will reset the TCP/IP stack back to its default settings.
After the restart, your network adapters should be reset, and any network connectivity issues you were experiencing may be resolved.
Disabling the default admin account in Windows 10/11
To disable the local administrator account in Windows, you can use either the Command Prompt or the Local Users and Groups manager. Here's how to do it using both methods:
Using Command Prompt
1. Open Command Prompt as Administrator:
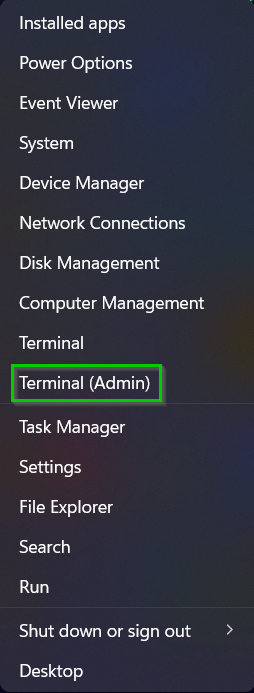
- Right-click the Start button and select “Command Prompt (Admin)” or “Windows PowerShell (Admin)”.
2. Disable the Administrator Account:
- Type the following command and press Enter:
net user Administrator /active:no- This command disables the built-in Administrator account.
Using Local Users and Groups
1. Open Local Users and Groups Manager:
- Press `Win + R` to open the Run dialog.
- Type `lusrmgr.msc` and press Enter.
3. Disable the Administrator Account:
- Right-click the “Administrator” account in the center pane and select “Properties.”
- Check the box “Account is disabled” in the Administrator Properties window.
- Click “OK” or “Apply” to save the changes.
Both methods will effectively disable the local administrator account, enhancing the security of your Windows system.
20 things you can do with Win+R
The "Win + R" keyboard shortcut in Windows, which opens the "Run" dialog box, is a quick way to access various utilities, folders, and settings on your computer. Here are 20 useful things you can do with the "Win + R" command:
1. **msconfig** - Open System Configuration to manage startup settings and services.
2. **cmd** - Launch the Command Prompt.
3. **powershell** - Open Windows PowerShell for advanced command-line tasks.
4. **appwiz.cpl** - Access the Programs and Features pane to uninstall or change programs.
5. **ncpa.cpl** - Open Network Connections to manage network adapters.
6. **services.msc** - Open the Services manager to configure or disable system services.
7. **resmon** - Launch the Resource Monitor to view system resource usage.
8. **diskmgmt.msc** - Open Disk Management to manage disk partitions and volumes.
9. **devmgmt.msc** - Access Device Manager to manage hardware devices.
10. **sysdm.cpl** - Open System Properties for advanced system settings.
11. **regedit** - Launch the Registry Editor to modify the system registry.
12. **compmgmt.msc** - Access Computer Management for system tools, storage, and services.
13. **cleanmgr** - Launch Disk Cleanup to free up space on your drives.
14. **control** - Open the Control Panel.
15. **eventvwr.msc** - Access Event Viewer to view logs and system messages.
16. **mstsc** - Launch Remote Desktop Connection to connect to another computer.
17. **msinfo32** - Open System Information to view detailed system data.
18. **snippingtool** - Open the Snipping Tool to capture screenshots.
19. **explorer** - Open File Explorer.
20. **calc** - Launch the Calculator.
These commands can enhance your productivity by providing fast access to frequently used tools and settings.
Running Syncthing Automatically and Hidden on Log on.
Here are the steps to run Syncthing automatically on startup and hide the terminal window on Windows:
Create a Task in Task Scheduler:
Press `Win + R`, type `taskschd.msc`, and press Enter to open Task Scheduler.

In the Task Scheduler, click on "Create Task..." in the right panel.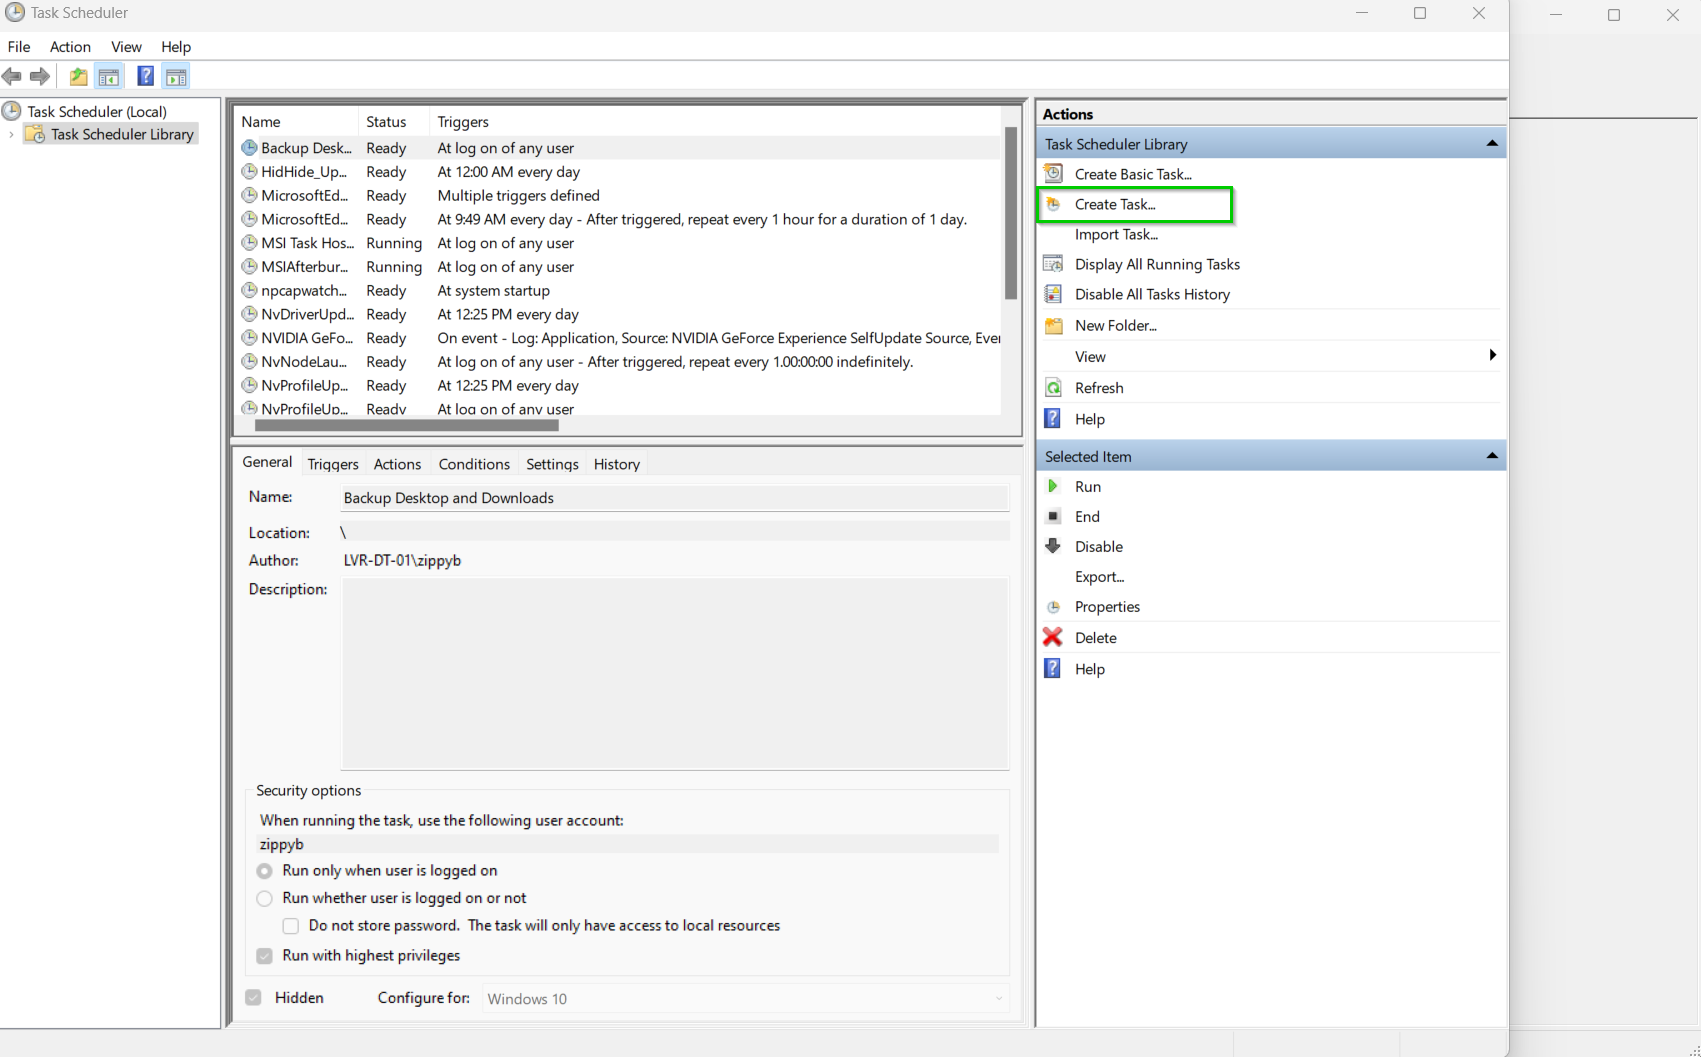
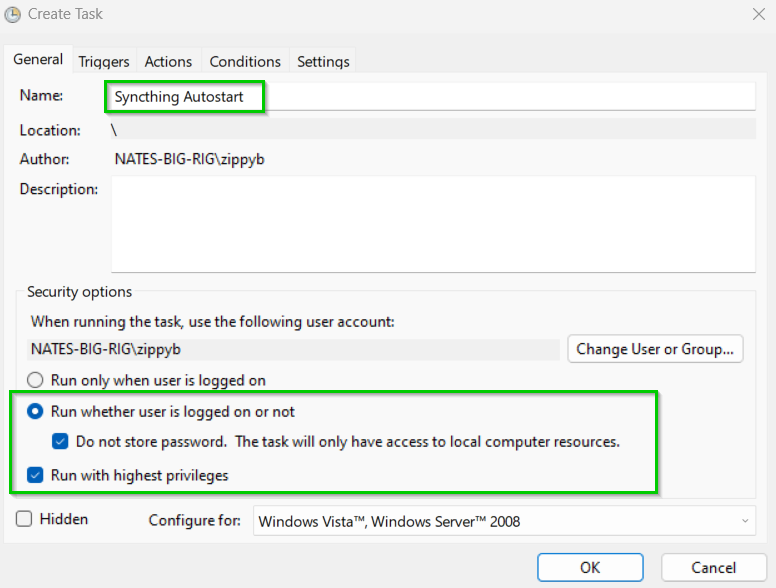
In the "General" tab, provide a name for the task (e.g., "Syncthing Autostart").
Select "Run whether user is logged on or not" and check "Do not store password" if you don't want to provide a password.
Check "Run with highest privileges".
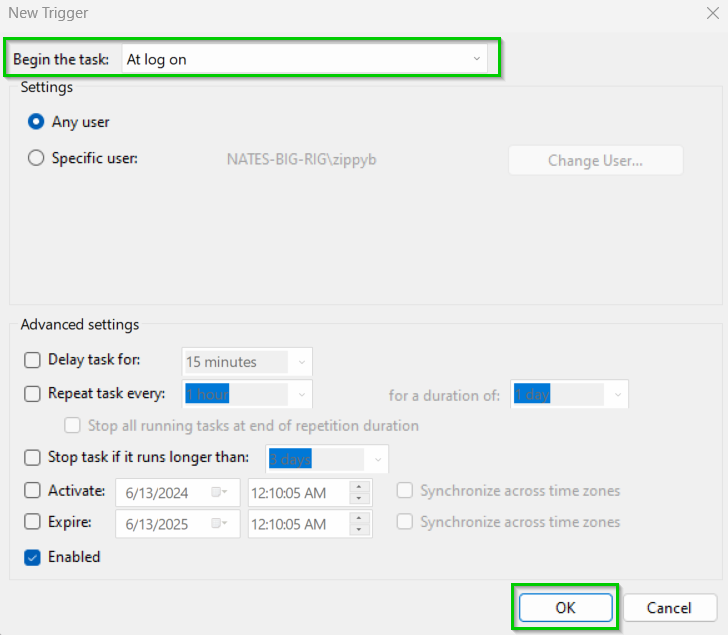
Configure the Trigger:
Go to the "Triggers" tab and click on "New...".
Set the "Begin the task" dropdown to "At log on".
Click "OK".

Configure the Action:
-Go to the "Actions" tab and click on "New...".
-Set "Action" to "Start a program".
-Click "Browse..." and navigate to the Syncthing executable (`syncthing.exe`).
-In the "Add arguments" field, add `-no-console -no-browser` to hide the terminal and prevent Syncthing from opening the web interface on startup.
-Click "OK".
Set Conditions and Settings:
-Go to the "Conditions" tab. Ensure "Start the task only if the computer is on AC power" is unchecked if you want it to run on battery power as well.
-Go to the "Settings" tab and ensure "Allow task to be run on demand" is checked. You can also set other preferences as needed.
Finish and Test:
-Click "OK" to finish creating the task.
-You will be prompted to enter your user account password if you chose to run the task with highest privileges.
-To test it, right-click the task in the Task Scheduler library and select "Run".
This setup should start Syncthing automatically when you log in and keep the terminal window hidden.
Using Robocopy
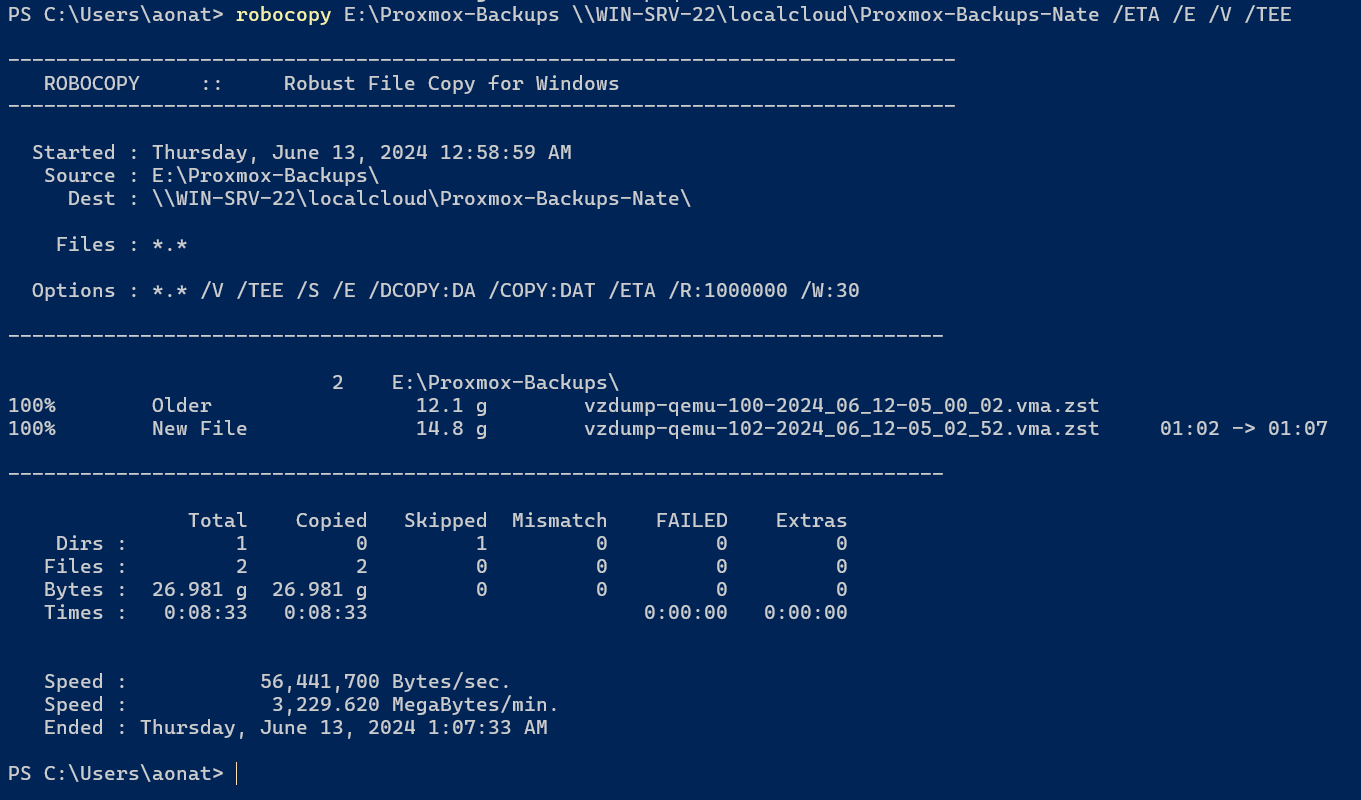
Example of copying files from a drive on my local PC to the cloud share:
robocopy E:\Proxmox-Backups \\WIN-SRV-22\localcloud\Proxmox-Backups-Nate /ETA /E /V /TEEExplanation of Options
- /ETA: Shows the estimated time of arrival for the transfer to complete.
- /E: Copies all subdirectories, including empty ones.
- /V: Produces verbose output.
- /TEE: Writes the status output to the console window as well as to the log file (if specified)
Final Output:
Windows Sysinternals Toolkit Walkthrough
Date: June 12th 2025
Category: Windows 11 Projects
Tools Installed
Installed via Chocolatey:
choco install sysinternals -y --ignore-checksumsInstall location:C:\ProgramData\chocolatey\lib\sysinternals\tools
Command-line access enabled for:
procexp
autoruns
procmon
tcpview
🔗 Official Microsoft page:
https://learn.microsoft.com/sysinternals
1. Process Explorer
-
Launched with
procexp -
Enabled VirusTotal integration:
-
Options > VirusTotal.com > Check VirusTotal.com
-
-
Investigated:
-
PowerPanel Personal.exe(flagged 1/72 — confirmed false positive)
-
-
Verified digital signatures via:
-
Right-click process → Properties →
Verified:field
-
-
Used Lower Pane View for:
-
DLLs and Handle usage
-
2. Autoruns
-
Launched with
autoruns -
Configured:
-
Options > Hide Microsoft Entries -
Options > Scan Options > Submit Unknown Images
-
-
Focused on reviewing:
-
Logon, Scheduled Tasks, Drivers, Services
-
-
Checked VirusTotal flags and verified digital signatures
-
Disabled or marked suspicious unsigned entries
3. Process Monitor (Procmon)
-
Launched with
procmon -
Paused default capture:
Ctrl + E -
Applied filters for:
-
Specific processes (e.g.,
notepad.exe) -
Registry and file system operations
-
-
Resumed capture for real-time inspection
-
Saved capture via
File > Save > .PML
4. TCPView – Active Network Monitoring
Tool Summary:
-
Launched with:
tcpview -
Displays:
-
All active TCP/UDP connections
-
Local and remote addresses
-
Process ownership
-
Packet counts and traffic volume
-
Observations:
| Process | Remote Host/Service | Notes |
|---|---|---|
firefox.exe |
google.com (via 142.250.x.x) |
Normal browser activity |
steam.exe |
valve.net, akamai.net, u2-puls.tech |
Related to Steam/Valve CDN |
PowerPanel |
Internal kubernetes.docker.internal |
Local/VM bridge — normal |
syncthing.exe |
u2-puls.tech / Docker bridges |
Syncthing sync traffic — expected |
WHOIS Lookup: akamaitechnologies.com
TCPView revealed connections to domains like akamaistream.net, a known CDN subdomain.
WHOIS record for akamaitechnologies.com:
| Field | Value |
|---|---|
| Domain | akamaitechnologies.com |
| Registrar | MarkMonitor Inc. |
| Created | August 18, 1998 |
| Updated | July 16, 2024 |
| Expires | August 17, 2025 |
| DNS | AX0.AKAMAISTREAM.NET, NS2-32.AKAMAISTREAM.NET, etc. |
| Status | Protected (delete/transfer/update disabled) |
| Registrar Abuse | abusecomplaints@markmonitor.com |
| Official Whois | https://www.icann.org/wicf/ |
🔗 Akamai Official Site: https://www.akamai.com
Conclusion:
-
Akamai is a globally trusted CDN and security platform used by Steam, Microsoft, Apple, and others.
-
Connections to
akamaistream.netand related domains in TCPView are expected and not malicious. -
WHOIS verified the legitimacy and ownership of the Akamai domains.
5. PowerShell Signature Verification
Command used:
Get-AuthenticodeSignature "C:\Path\To\File.exe"Example:
Get-AuthenticodeSignature "C:\ProgramData\chocolatey\lib\sysinternals\tools\procexp.exe"Reviewed:
-
Statusfield =Valid -
SignerCertificate.Subject= Trusted vendor (e.g., Microsoft Corporation)
There are tons of other tools for system analysis as well.